
Basket is a free Drupal module that provides an out-of-the-box online store solution. It allows you to configure currencies, delivery, payment systems, and order management, with a system for email notifications and Twig template editing directly from the admin panel. The module is designed for flexibility and can be extended with plugins and integrated into existing Drupal projects.
New free Drupal store module (alternative to Drupal Commerce). With this module you can create a fully functional online store on CMS Drupal, which works immediately after installation.
The module can be extended based on plugins that are implemented in it and which give it great flexibility and adaptability for different tasks. All this ensures the development of the store in accordance with modern requirements and standards of e-commerce.
Features
- Can work simultaneously with many types of materials (node).
- Has its own price field and works only with it.
-
There is a customization system:
- Currencies.
- Delivery.
- Payment systems.
- Order management with the ability to filter / export / print invoices.
- System of e-mail notifications about new orders.
- Template system (twig editor) that can be edited directly from the admin panel. There is also a preview.
Advantages:
- Simple installation
- Ability to install the module on an existing project
- Flexibility and adaptability of the module
- No need to install additional packages and advanced php settings (module works with basic php settings).
Need support for your Drupal store?
- Support from 99$/month.
- Any modifications to the store at a rate of 50$/hour.
- Individual store design from 1499$.
For support, please email [email protected]
Free help for Alternativecommerce owners
Dependencies
- Node
- Token
- SCSS/Less Compiler
- Views
Setup
- To start, you need to install the modules:
- On the module site, you need to scroll down to the download link. Then right-click on the link, and copy the address sent.
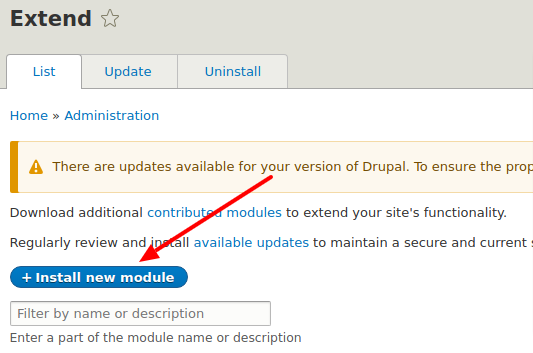
- Then you go to your site on Drupal, and in the admin panel click on "Extend" (Screenshot "Extend" in the attachment). After you go to the Extend tab, you click "Install new module" (Screenshot "Install new module" in the attachment).
- In the "Install from a URL" field, paste the link you copied on the module's website and click "Install" (Screenshot "Install" in the attachment)
- Once you have installed the module, you need to turn it on. To do this, click "Enable newly added modules" (Screenshot "Enable newly added modules" in the attachment)
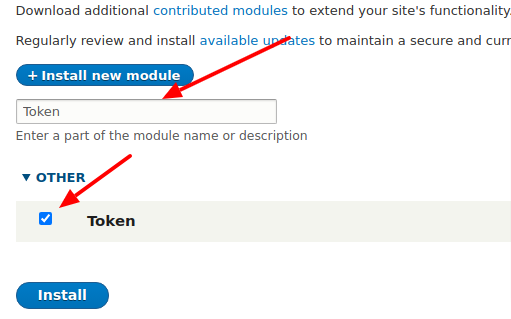
- Then in the search box, enter the name of the module you installed (in this case "Token"), and put a "checkbox" before the name of the module. Then click "Install" again (Screenshot "Install-Token" in the attachment).
- To install "SCSS/Less Compiler" you need to perform the same steps as for "Token", but before installing you need to go to the folder with your site, and create a new folder "libraries"
- To install "SCSS/Less Compiler" you need to perform the same steps as for "Token", but before installing you need to go to the folder with your site, and create a new folder "libraries". Then copy the scssphp folder there, which can be downloaded from the SCSS / Less Compiler website. Then unzip the archive to the "libraries" folder.
- After installing SCSS / Less Compiler, you need to reset the site cache in the admin panel.
- Now you can install the "Basket" module, it is installed in the same way as the "Token" module.
- If you did everything right, it appears in the admin panel
new tab "Shop" (Screenshot "Shop" in the attachment).
After installing the module, you will need to configure its main functions:
-
Creating a product page.
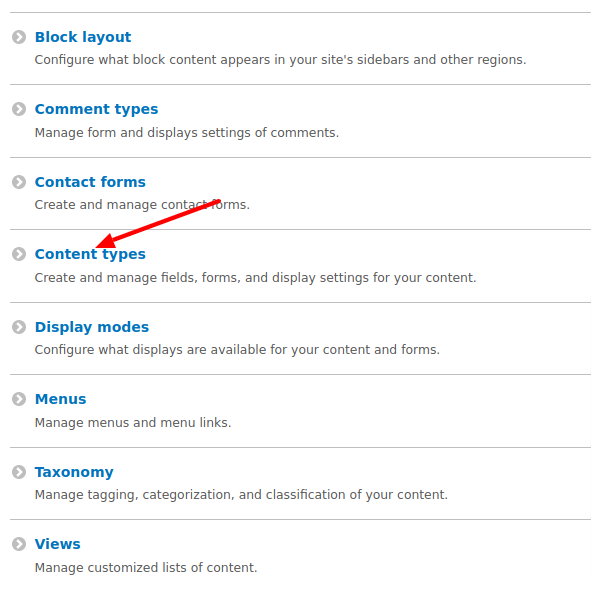
- To create a product page, you will need to create the structure of that page. To do this, you need to go to the tab "Structure" in the administration panel. Then in the "Structure" tab you need to go to "Content types" (Screenshot "Content types" in the attachment).
- According to the link "Content types", you need to click "Add content type".
- Now you need to give the name of the content, we will have the product, so we give it the name "Goods" (Screenshot "Goods" in the attachment).
- We do not change or write anything else on this page. We just keep it.
- After saving, you will go to the page "Manage fields", it will already have one field called "body", we do not need it, so we will delete it. To do this, click "Delete" (Screenshot "Delete" in the attachment).
- Then go to create your own fields, click on "Add field"
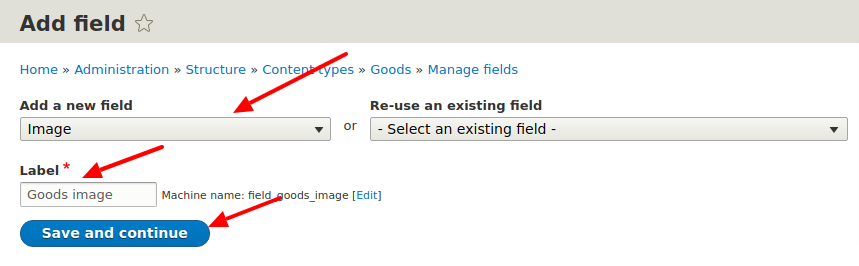
- On the "Add field" page, you need to select the type of field, select the type "Image", and give it the name "Goods image". Now save the field (Screenshot "Goods image" in the attachment).
- Now you need to create a price field and a field to display the balances of the goods, for the price field you need to select
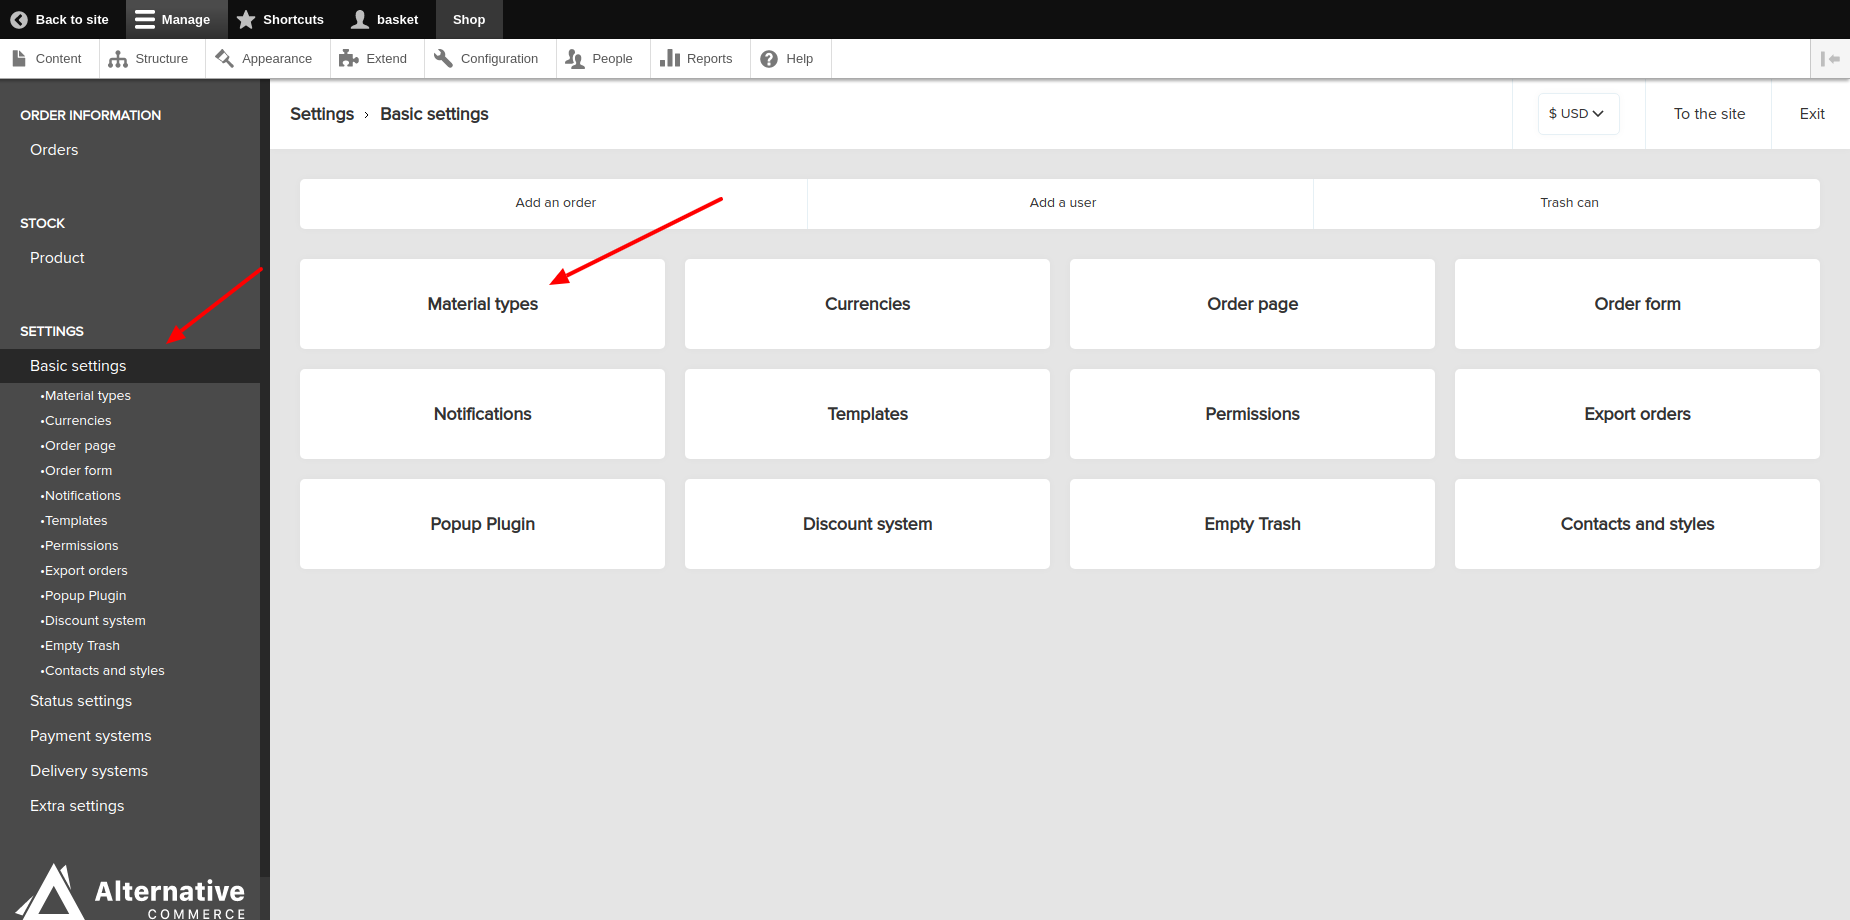
field type "Basket Price Field", and for product balances you need to select the type "Number (integer)". Other fields are added on the same principle. - Now you need to go to the link "Shop" and go to the Basic settings tab. Then go to "Material types". (Screenshot "Material types" in the attachment)
- Follow the link "Material types" to click "Create", and in "Material type" select the content you created.
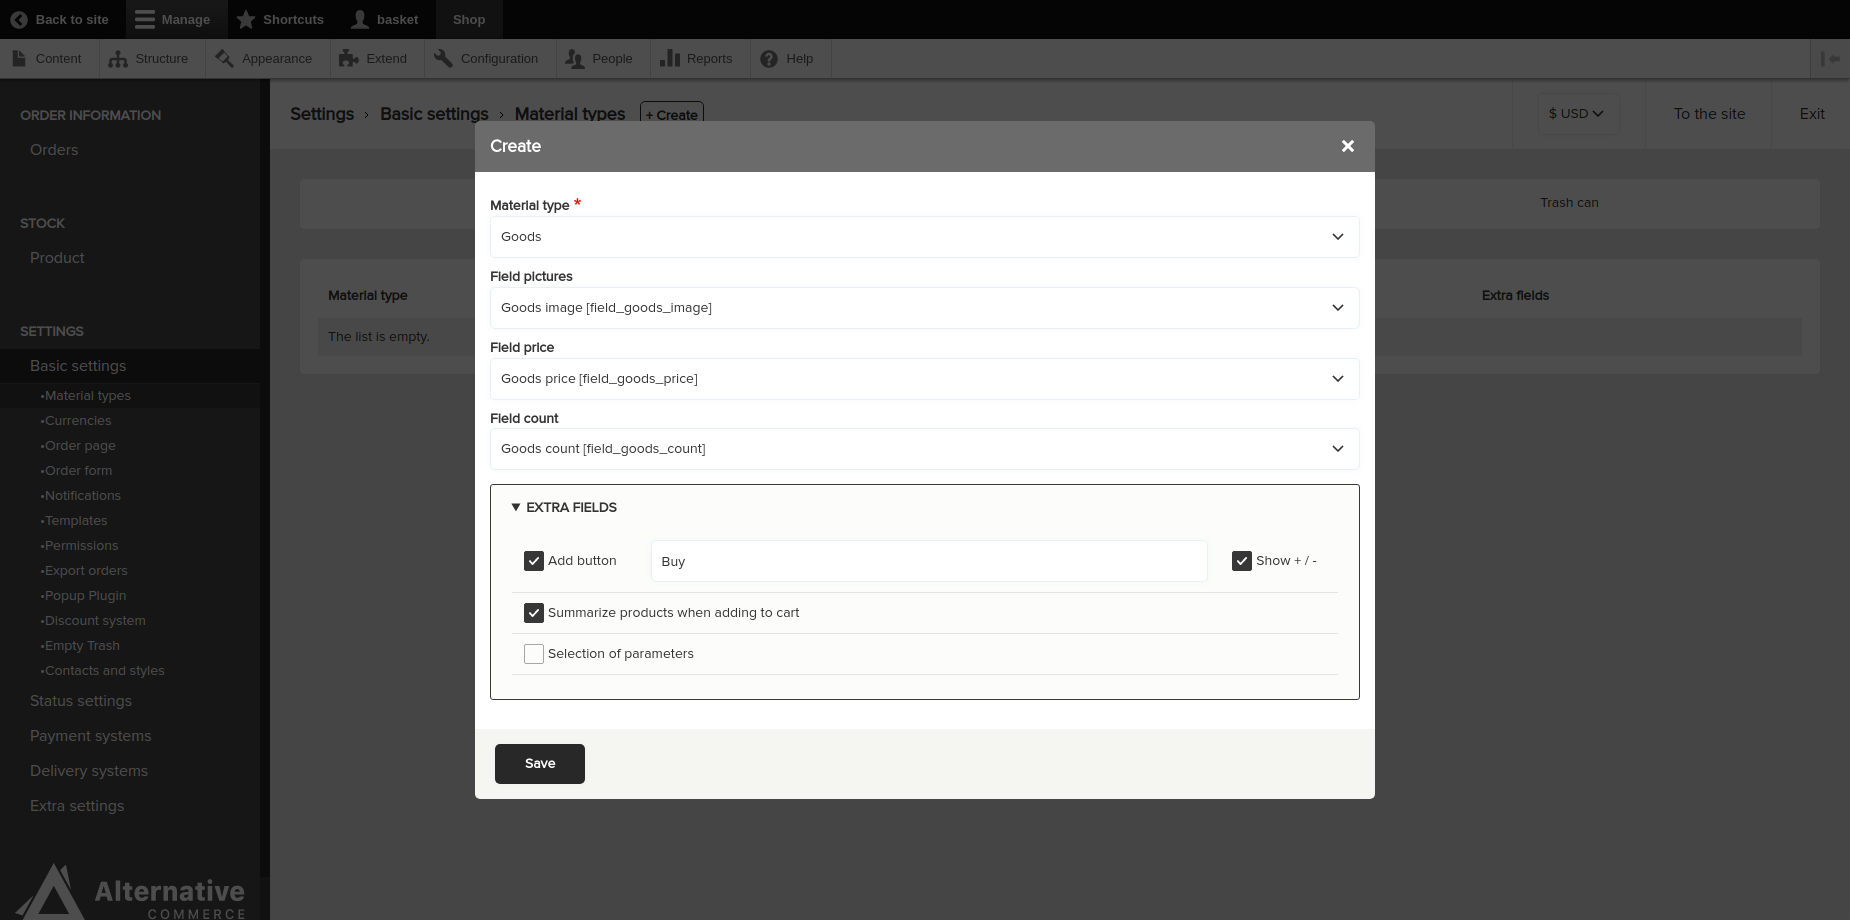
- Now in the appropriate fields, you need to add your fields. We can also add a buy button with your text, buttons to increase the quantity of goods, and we can make the goods in the basket add up. Once selected, save everything you need (Screenshot "Create Material type" in the attachment).
- The "Add a product" button now appears in the menu (Screenshot of "Add a product" in the attachment).
- After that, you can create the first product by clicking on the "Add a product" button. If you did everything right, you will receive such a product page. (Screenshot of the "Product Page" in the attachment).
- After setting up the types of materials, your products will appear in the warehouse, as well as the ability to manage them
/admin/basket/stock-product. -
Setting the types of materials with which the cart will work
/admin/basket/settings-node_types.- Specify the field from where the basket will take the picture.
- Specify the field where the basket will take the price from (works only with its own type of field).
- Specify the field from where the basket will take stock.
- Specify settings for the add to cart button.
- You can also specify whether a form with parameters will be available. For the parameters, you will need to create a separate plugin.
- After setting up the types of materials, your products will appear in the warehouse, as well as the ability to manage them
/admin/basket/stock-product. - The output of the add button will become available
/admin/structure/types/manage/NODE_TYPE/displayas well as through the view. - To display the block with added products to the cart, go to section
/admin/structure/blockand add the "Basket count" block to the required region. - There are also many other settings that can be found here
/admin/basket/settings-base.
Add-ons / Related Projects
- Liqpay payment API - payment gateway for a site based LiqPay API v3.0.
- Payeer Electronic Wallet - payment gateway for a site based https://payeer.com/.
- EtherAPI - payment gateway for a site based https://etherapi.net/.
- Bitaps payment - payment gateway for a site based https://www.bitaps.com/.
- Perfect Money - payment gateway for a site based https://perfect.money/.
It is also possible to expand the store module with such paid modules as Portmone, Paypal, Interkassa, Skril and others. Due to paid modules and support, we are able to develop and publish some of the free modules. By attracting commercial customers and cooperation with them, we got the opportunity to lay out a free store and in the future we plan to upload more free plugins.
🇺🇦
This module is maintained by Ukrainian developers.Please consider supporting Ukraine in a fight for their freedom and safety of Europe.